Removing the B18B1
At this point, I had known enough about the existing setup and any peculiarities in its past. Removing the engine was a three day process just because I took my time with it and also needed to buy tools as I went. I also went the extra mile and assorted all the bolts into labelled containers for easy access later on. Really though, below is everything you need to rip out an engine.
- WD-40 - very useful for siezed bolts
- Impact driver and high torque wrench - can be done by hand but power tools are just worth it. You will need something high torque to crack the engine mounts and axle nut, which is a 32mm nut.
- Metric sockets and deep sockets - almost half the car was made from 10 and 12mm bolts
- Metric wrenches - to hold the other side of the nut/bolt on things like the exhaust spring bolts, ratcheting head optional but recommended (though I did it without them)
- Screwdrivers - for things here and there
- Pliers - for tricky connectors and springband clamps
- Ball joint seperator tool - a hammer may be a replacement but this is worth the investment
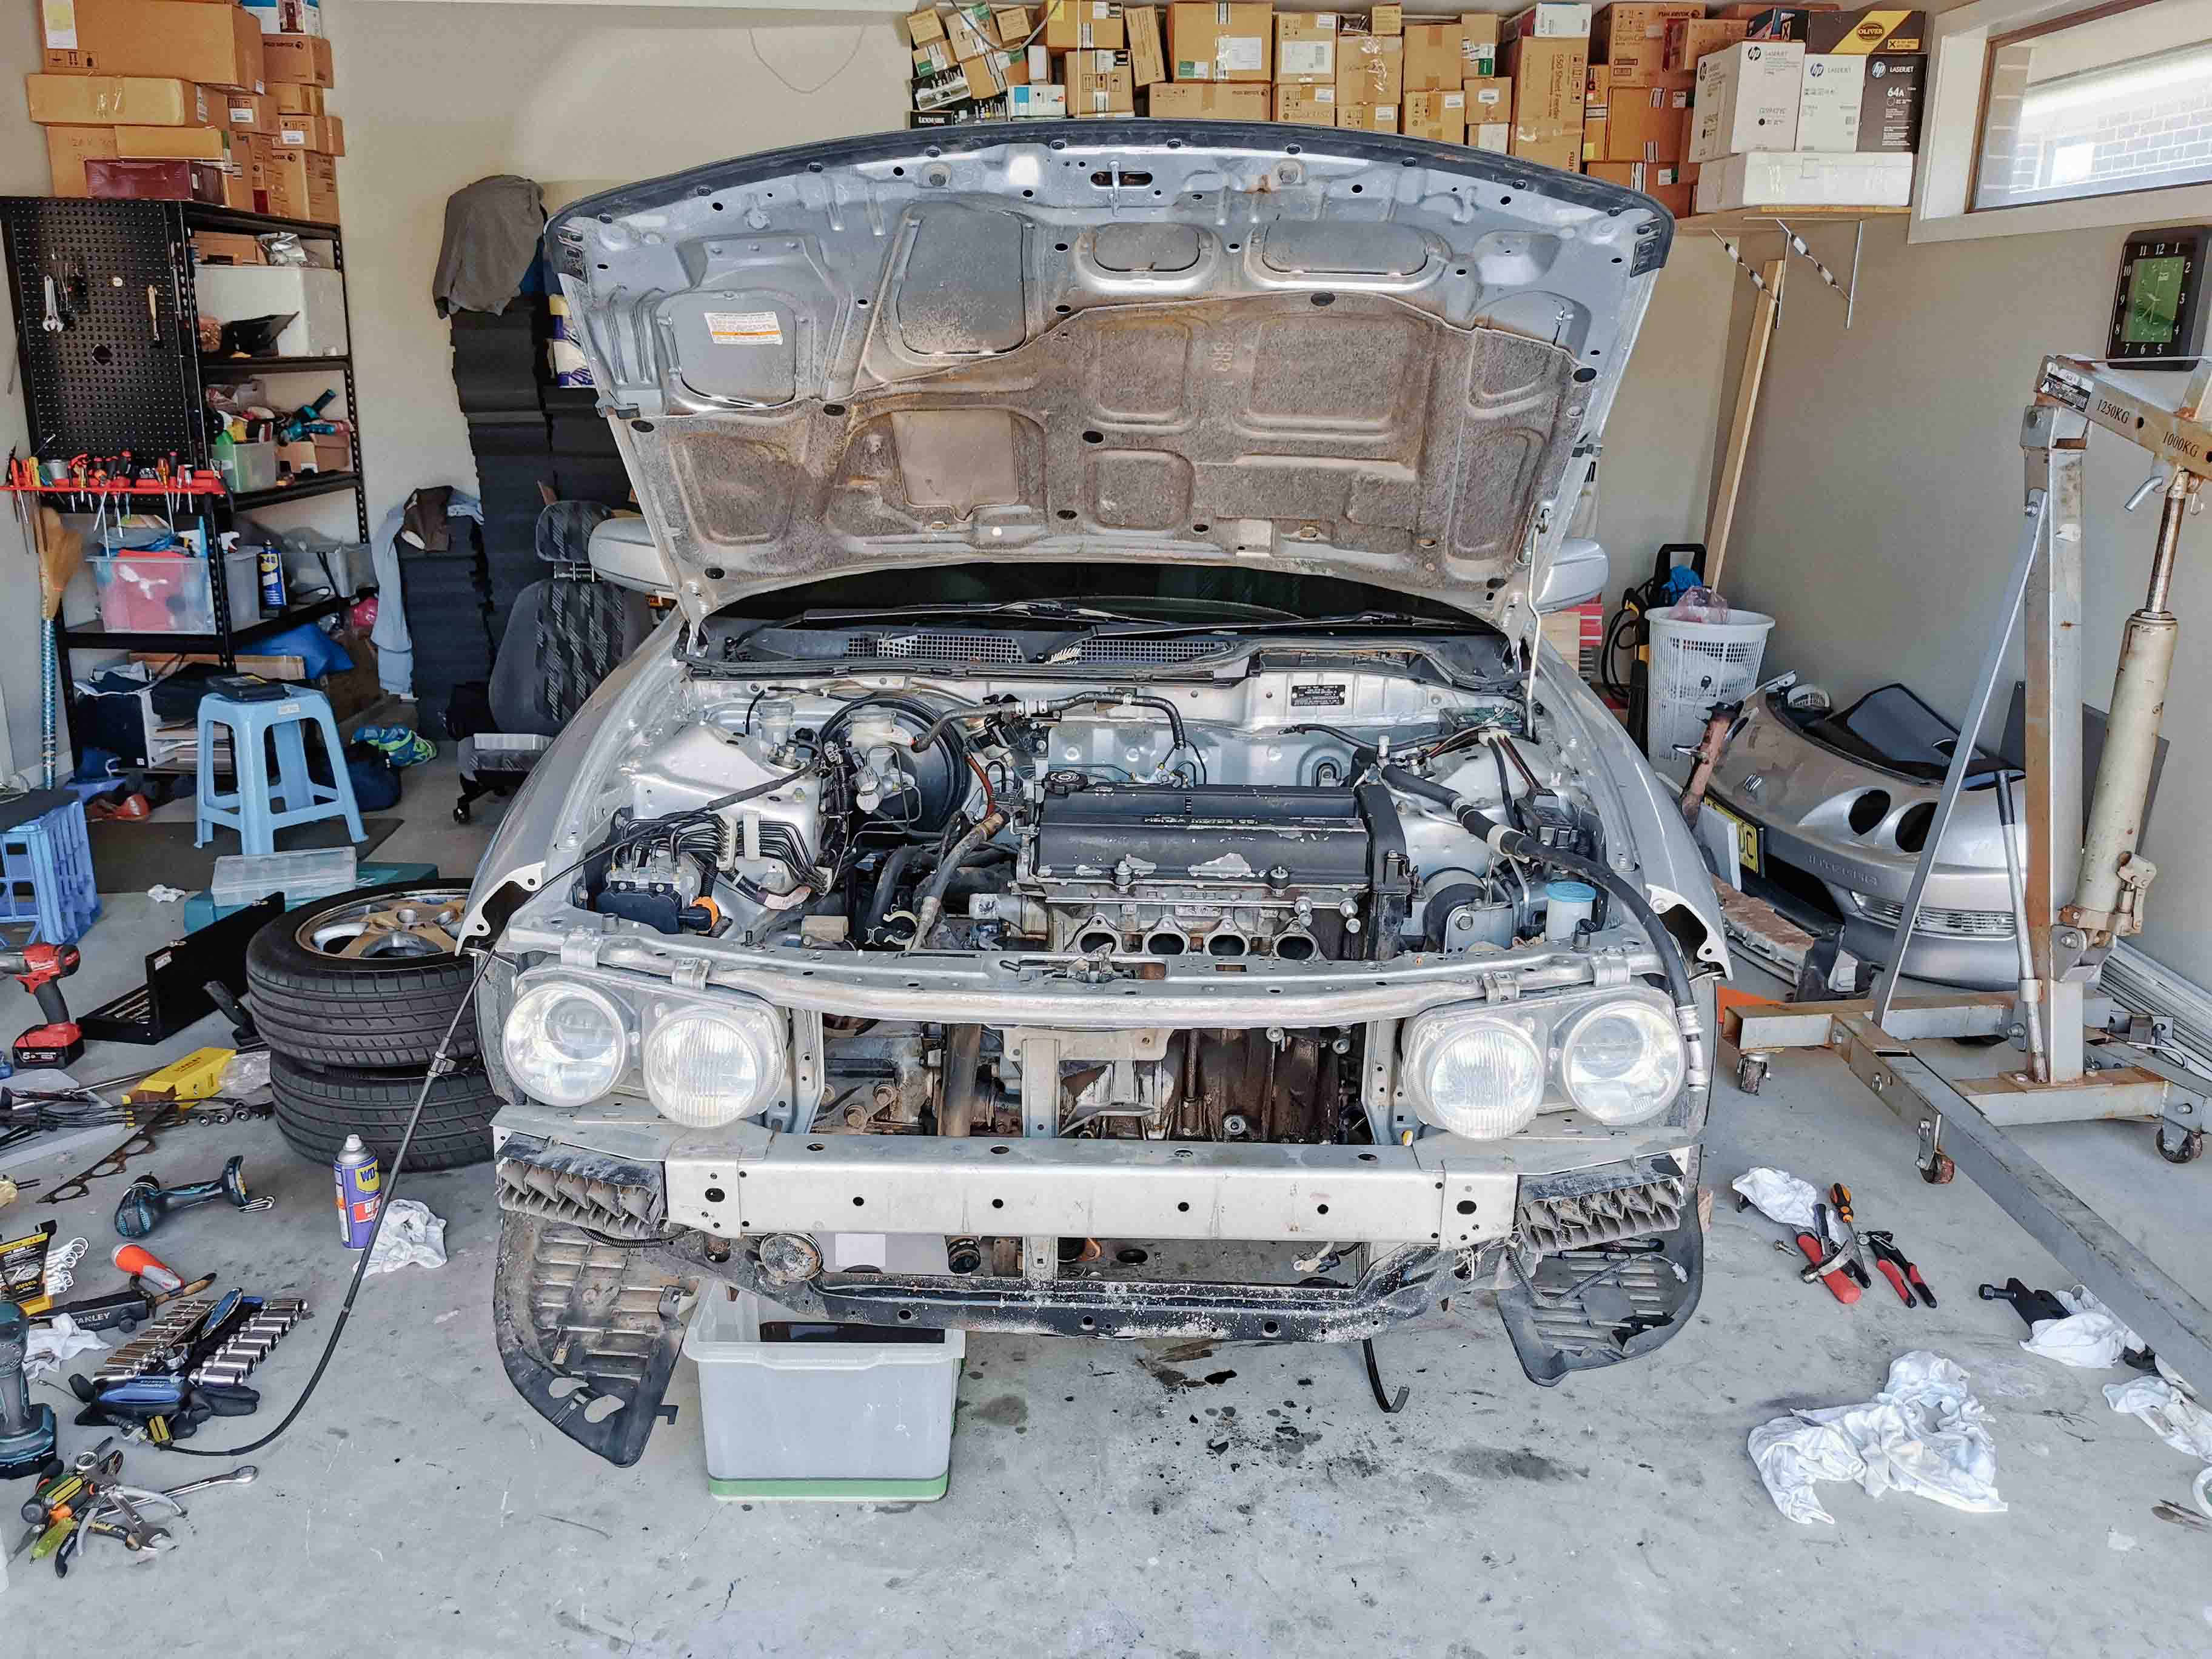
The process of removal was pretty straight forward.
- Degas AC system - call a mobile AC doctor or take it to a shop
- Drain all the fluids - don’t forget the transmission oil
- Disconnect transmission - good luck with the bitch pin, use an M8 bolt and hammer it out or lift the engine out with the linkage attached like I did
- Unplug as many connectors on engine loom
- Disconnect and remove intake manifold and headers
- Disconnect all hoses and hardlines
- Disconnect engine loom
- Remove axles - pop out the balljoint on the LCA and tie-rods and shake it out of the knuckle
- Hang the engine off the hoist, add a slight bit of tension and undo all motor and torque mounts
- Lift engine and transmission out
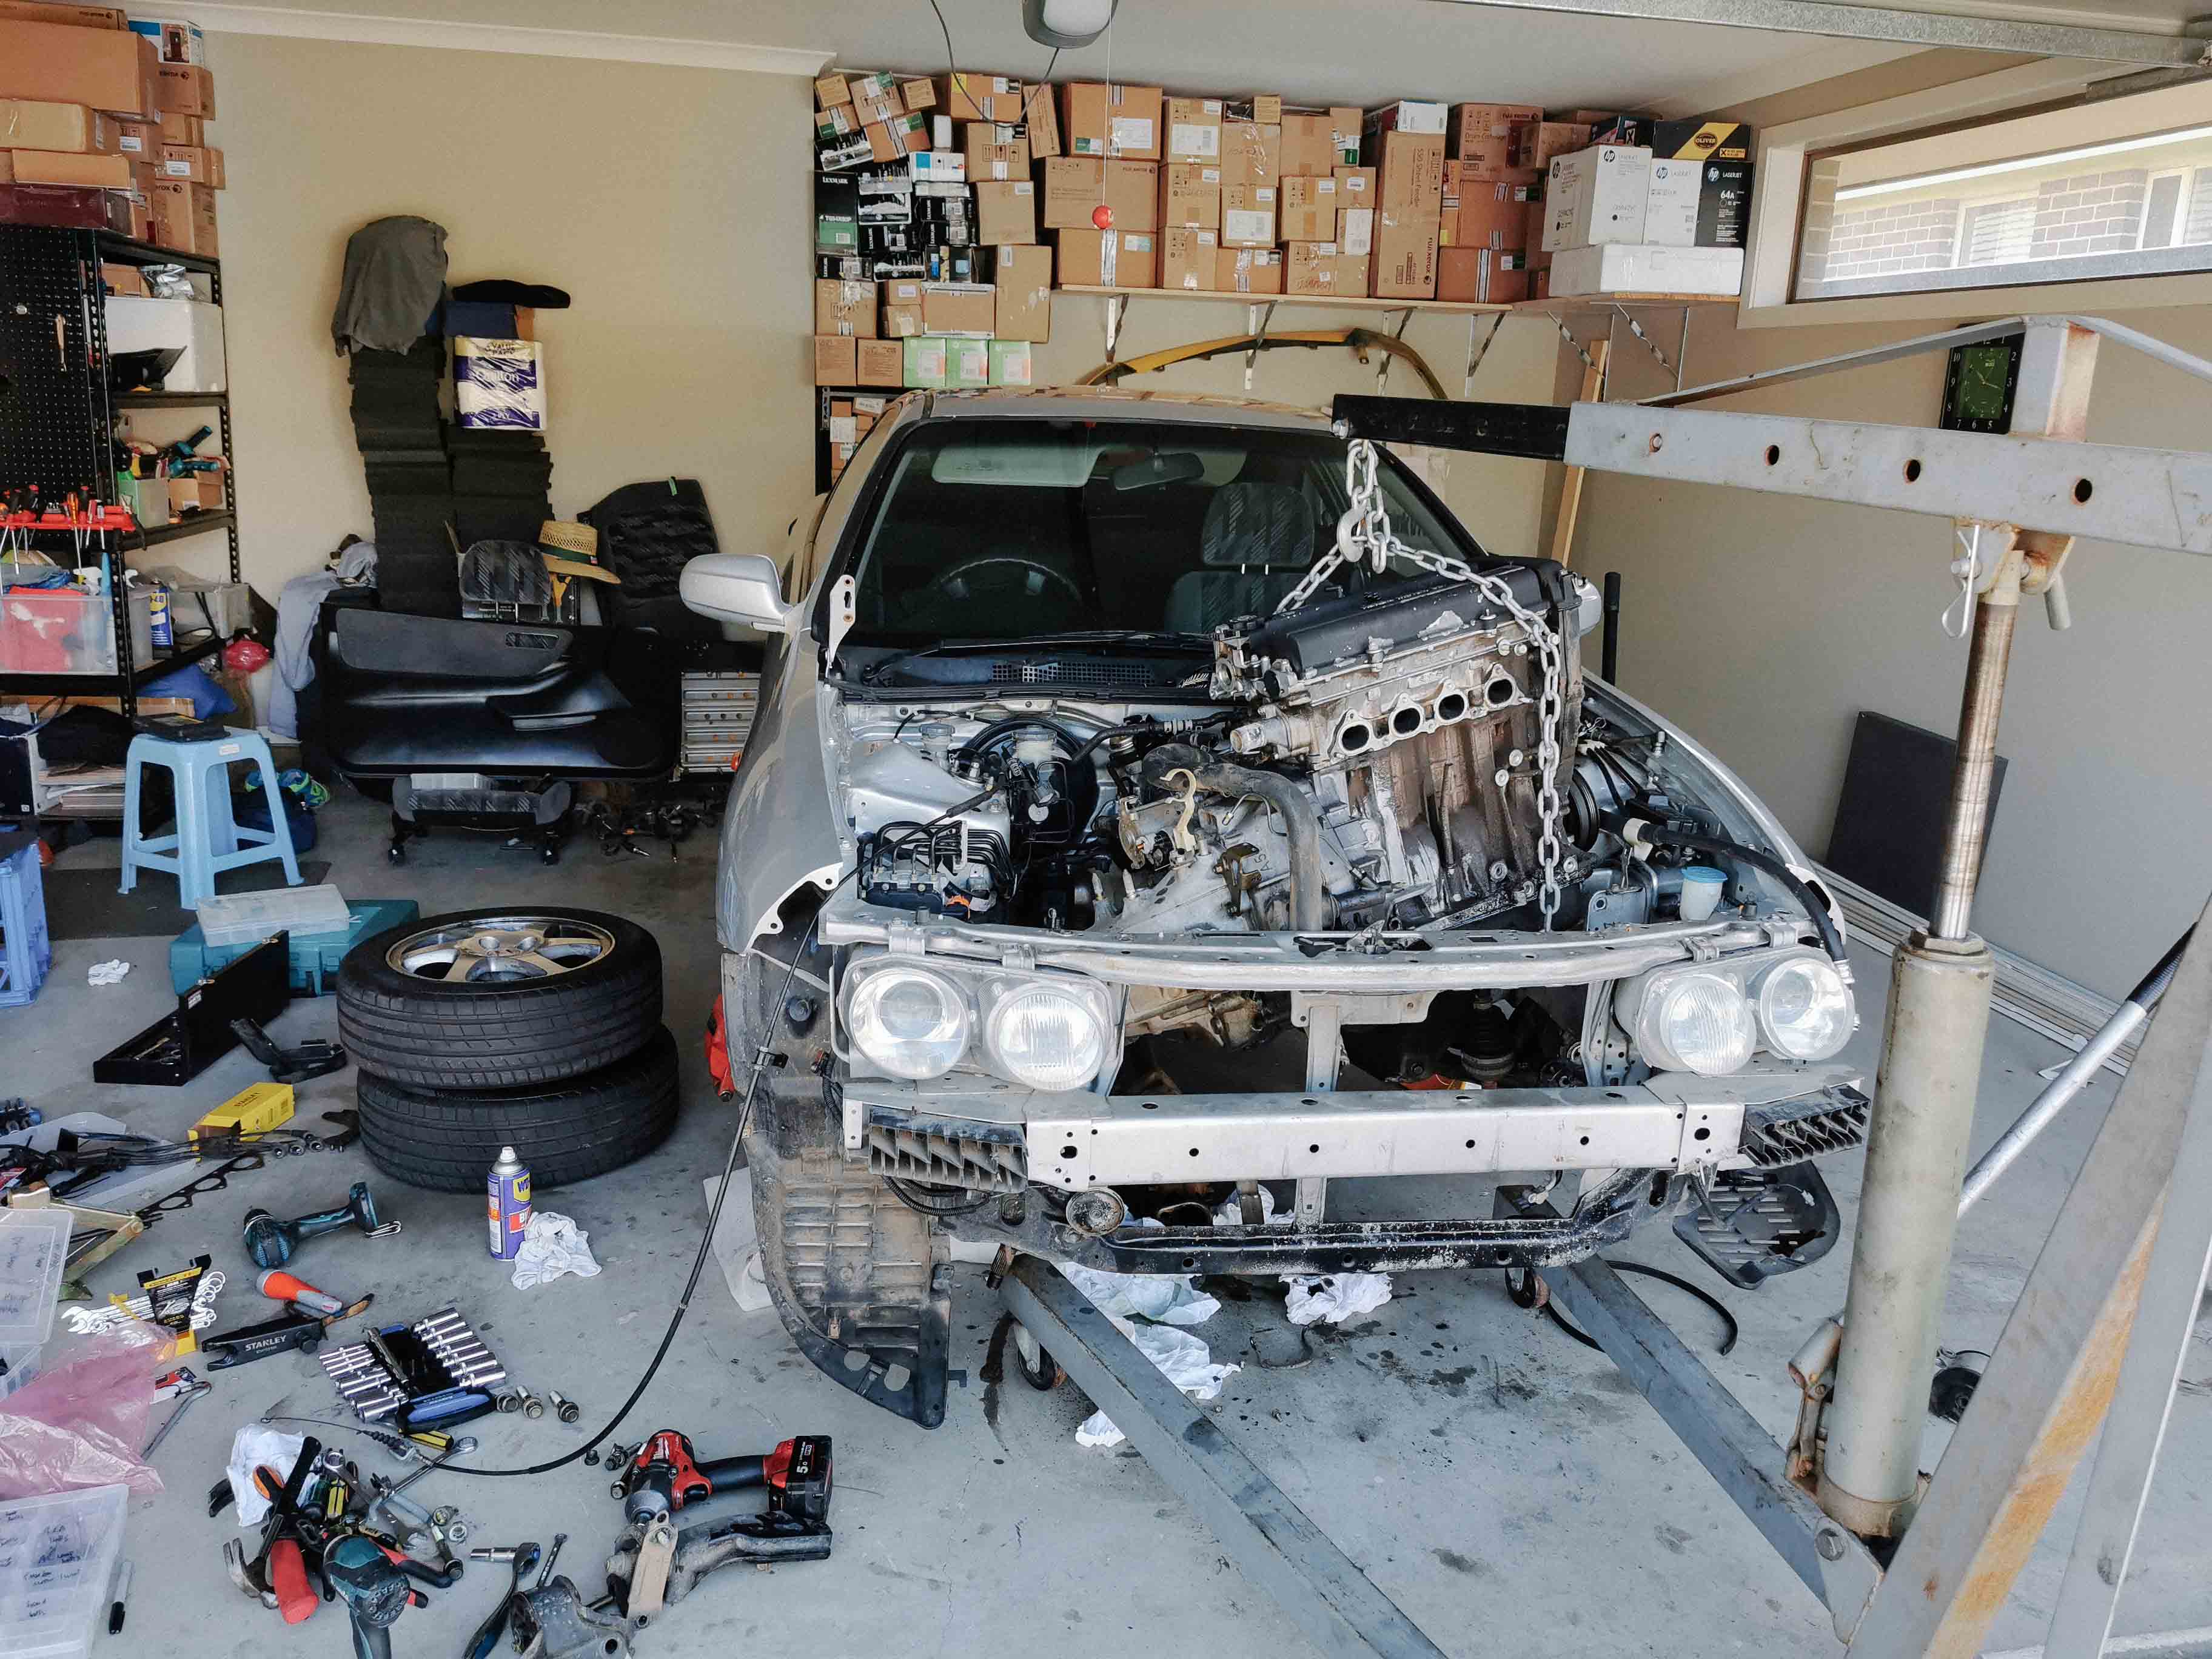
The whole process was pretty painless except a couple things which I wanted to talk about below
Axles
You will need to remove the ball joints on the tie-rod and LCA. Depending on age, these would be on pretty hard so you need to pop them out with the tool, or else you will waste lots of time with a hammer and chisel. I also failed to remove the axles off the intermediate shaft. They were in there tight, most probably due to the grease thats all but gone since I don’t think they’ve been serviced since 2000.
Intake manifold bolts
Getting access to the ones on the bottom was hard, having a small 12mm spanner was really useful. Luckily they were not torqued hard, if they were, then it’s worth getting a flexihead ratcheting spanner to get some leverage on them. It’s made much easier once you remove the transmission support mounts and coolant hoses.
Axle nuts
While I didn’t have a problem this time, when we parted out Joey’s EG, we had difficulty in cracking the axle nut once the car was in the air. Having a mid/high torque impact wrench is the way to go. I used a Milwaukee item to crack the axle bolt pretty easily. Use a screwdriver and pop it into the rotors near the caliper so when the wheel turns, the screwdriver stops the wheel from turning so that you can apply torque. You will need a 32mm socket.
Harness connectors (shock tower and distributor)
The connectors that are mounted on the plate (like the distributor ones or all the ones at the shock tower) do not unplug if the connectors are on the mounted plate. The latch is a two part system such that first you need to unmount the connectors off the plate (via screwdriver, lift the tab and slide out the connectors) and then unclip the male and female end of the connector. Or else you will risk breaking the connectors.
During engine removal I did try to retain all the things on the chassis side of things, such as AC hardlines and heater hoses. The power steering stuff can all come out though. Same with the EVAP canister system, however you will need to mount this somewhere to pass engineering. Now starts the process of cleaning it up.